Disclaimer: Always exercise caution when making changes to core website files.
When I first came up with the idea of tbd, I knew that I wanted a button that would allow readers to find new content in a fun way. Ideally after the button was pressed, some animation would follow, and the reader would be taken to a random blog. Well, I never had time to implement the animation piece, but I did figure out how to add the randomness feature, which you can add to your WordPress site as well!
Try out our random blog generator on the right hand side of our home page! (Or if you are on mobile, it’s about halfway down the page). We can’t add it here because this page contains user inputs, but the button looks like this:
BELOW ARE THE 3 STEPS I TOOK TO ADD A CUSTOM RANDOM LINK GENERATING BUTTON
Note: Before you begin, this method may not be the easiest or most effective for your website, but it was for my site, especially since I had minimal knowledge of jquery, javascript, and php. Also, avoid putting this button on pages that have user inputs, for instance contact forms, comments etc to reduce the potential for hacking. One further note, I have not tried this with method with Elementor or any other WordPress editors except for the default WP visual editor so I cannot tell you whether it will work or not.
-
The first step is to turn on ‘onclick’ attribute capability for the WordPress default visual editor.
WordPress’s default visual editor (also known as the TinyMCE visual editor) automatically disables a host of attributes like onclick and onload for html security reasons, so you have to manually enable it first before you can use it. I googled and found a number of ways to do this, but what ended up being the easiest for me was to add two pieces of code to my functions.php file. You can add this to your theme functions.php or your WordPress functions.php file, although I would recommend adding it to your theme file, this way the file will not be written over when WordPress updates itself, it will only be written over when you update your theme. I would further recommend to turn these two pieces of code into a plug-in so that they are not impacted by WP or theme updates. I won’t describe how to do that in this tutorial but I might write about in a future tutorial. Note: please backup the file before editing in case you make a mistake.
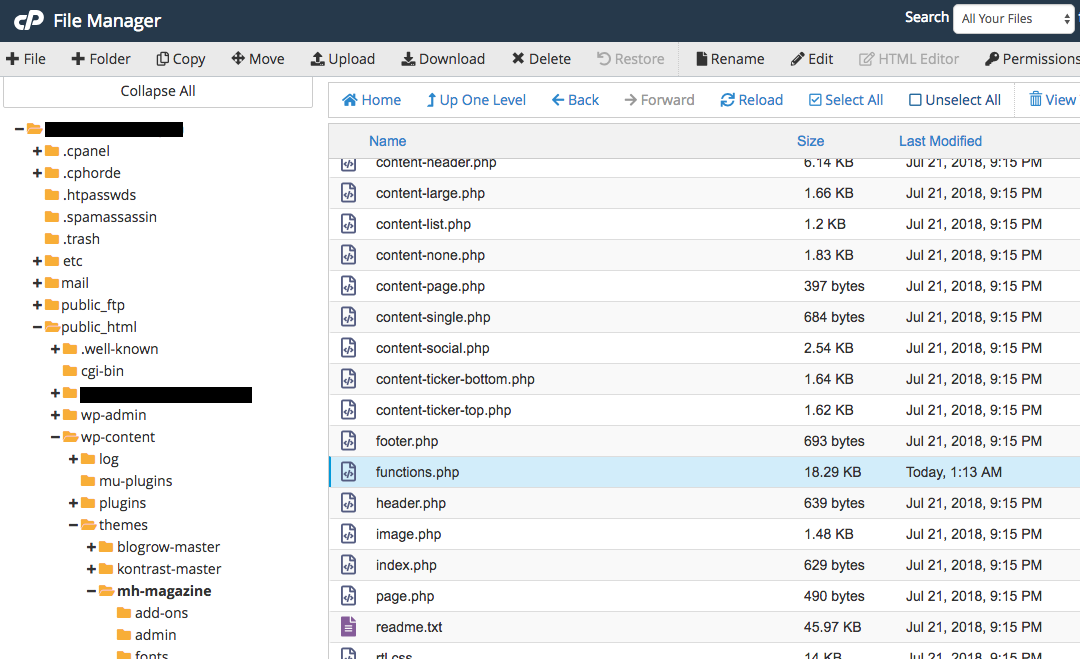
Since my WordPress was not allowing me to edit the functions.php file through the editor, I had to go to my Bluehost file manager to find the file. Not difficult at all, but just a small additional step. Locate it at public_html –> wp-content –> themes –> your_theme_folder –> functions.php. For security reasons, I’ve blacked out certain folder names from my example.
Once you’ve located the file and saved a copy, right-click it to edit it. You will add the additional two pieces of code below the existing code that you see (without altering or deleting any existing code), to expand the functionality allowed by the visual editor:
function allow_onclick_content() {
global $allowedposttags, $allowedtags;
$newattribute = "onclick";
$allowedposttags["a"][$function allow_button_onclick_mce($The first function allows the onclick attribute, and the second function allows visual editor to not automatically delete any attribute tag with the word onclick while you are editing.
2. Now that you have turned on the ability to use the ‘onclick’ attribute, you can start creating the program.
I’ve borrowed a program that I saw online and modified it – simply put the websites that you want the button to randomly navigate to in the vars urls statement below. Note, if you have more than 20 websites, it’s probably best to put the javascript in a .js file and call to it instead of embedding it into the html, but this is easier for starting out with. Here is an example program below that you can edit and place into the html text area of the visual editor.
Note: If you have a WordPress security plug-in activated, you may need to take additional steps in order to save your program. I use Wordfence and when I save the program a message will pop up prompting me whether I want to whitelist this action, click yes. Alternatively you could also deactivate the security plug-in you are using, add and save the code, and then reactivate the plug-in.


Be the first to comment