

Disclaimer: I have not been paid by anyone to endorse or review the plug-ins mentioned below. The opinions provided are solely my own.
Recently I had the need to add some calligraphy and brush fonts to my website. What should have been a pretty intuitive process ended up taking me more than half a day to figure out where to download the fonts, how to convert and upload them to WordPress, etc. As usual, WordPress does not make it easy, but there are a couple tips and tricks I learned along the way to make the process easier!
This tutorial will outline an easy method that requires a minimum of purchase of $10 for an unlimited number of font conversions, a semi-easy free method and a manual free method that takes a lot more legwork (I honestly did it only for the sake of being able to say I had tested it). If the $10 is not an issue to you, I highly recommend the easy method.
Btw a few of my favorite brush and calligraphy fonts are:
Beautiful bloom
Saturday script
Born ready
Angeline
Selima
First of all, before you begin, it’s good to check if there’s a way to achieve the desired look without using custom fonts. (For instance simply taking a screenshot of the text that you are interested in and adding it as a image file.) However, there’s a lot of times when this option is not available or customizable enough for your needs, in which case proceed below to the tutorial.
EASY METHOD
-
The first step is to download the custom font.
There are many sites where you can do this, and most fonts can be used for free non-commercially (if your website does not host ads or sell anything). Some are free for use commercially as well. Please read and follow each font description for its terms of use. I downloaded my fonts here, and here.Additionally, if you saw a font you liked on another website or in an image, and you don’t know the name of it, you can use this nifty site to reverse look-up the name of a font using its url or image (like a font Shazam)!
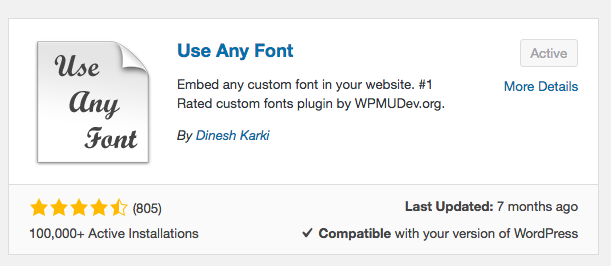
- Once you have your font downloaded and unzipped they should be in .ttf or .otf format. But before they can be used they need to be converted to web format. Download the WordPress plug-in Use Any Font. This plug-in will allow you to convert one font for free. It is an additional $10 (minimum donation) to convert an unlimited number of fonts.

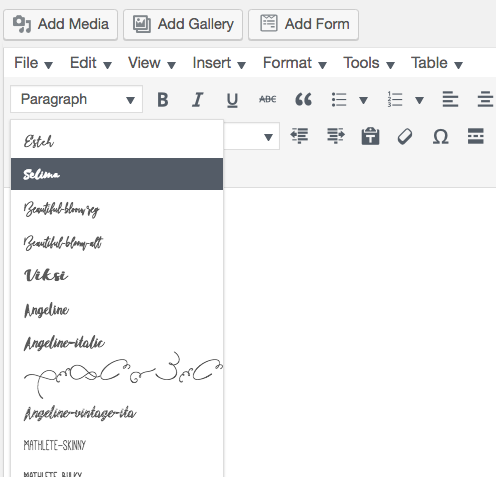
- Follow the instructions of the plug-in to download an API key, upload your custom font, convert it and assign it a name. You will need the API key in order to convert the font. Once you finish the setup the font should be immediately available to you in the drop-down font selector of your WordPress visual editor (also known as the WP TinyMCE visual editor), and you can immediately start using this custom font in your website!

SEMI-EASY FREE METHOD
-
The first step is the same as before – to download the custom font
There are many sites where you can do this, and most fonts can be used for free non-commercially (if your website does not host ads or sell anything). Some are free for use commercially as well. Please read and follow each font description for its terms of use. I downloaded my fonts here, and here. Additionally, if you saw a font you liked on another website or in an image, and you don’t know the name of it, you can use this nifty site to reverse look-up the name of a font using its url or image!
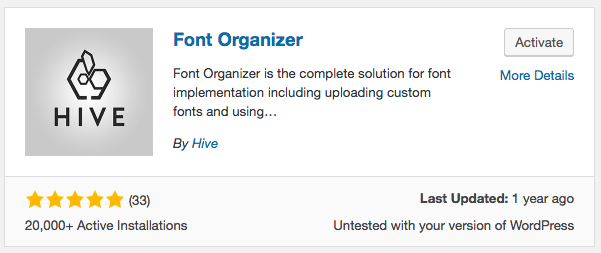
- Once you have your font downloaded and unzipped they should be in .ttf or .otf format. Download a free font plug-in such as Hive font organizer that will allow you to upload webfonts and synchronize them to your WordPress visual editor. This should be as simple as Use Any Font, except that when I tried using Hive it uploaded my custom font but also removed all the previous fonts I had from the WP visual editor. If I were to really use it I would need to manually select all the previous fonts I had in my editor plus the custom fonts I need, which is a little more hassle than Use Any Font.

MOST CHALLENGING FREE METHOD
-
The first step is the same as before – to download the custom font
There are many sites where you can do this, and most fonts can be used for free non-commercially (if your website does not host ads or sell anything). Some are free for use commercially as well. Please read and follow each font description for its terms of use. I downloaded my fonts here, and here. Additionally, if you saw a font you liked on another website or in an image, and you don’t know the name of it, you can use this nifty site to reverse look-up the name of a font using its url or image!
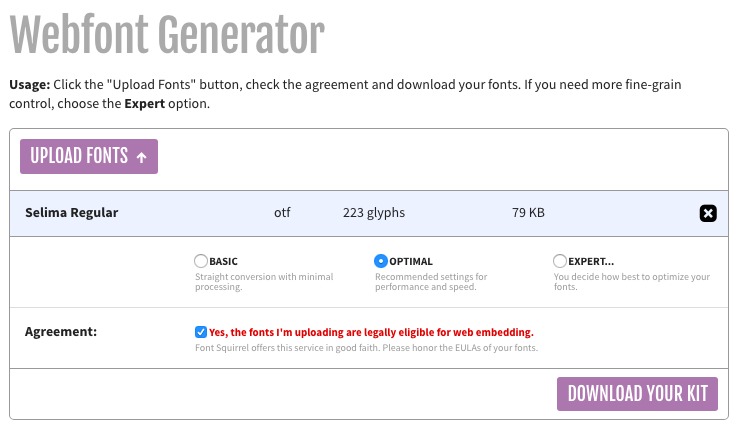
- Once you have your font downloaded and unzipped they should be in .ttf or .otf format. Although most browsers can now support the .otf and .ttf font formats, it’s still best practice to convert them to .woff or .woff2 format for compression and search engine optimization (read: text can be found by search engines versus images of text). Use the Fontsquirrel webfont generator to upload and convert your font(s) to web format. Click download your kit when you are done and save and unzip the file (I’ve named my kit selima_webfont).

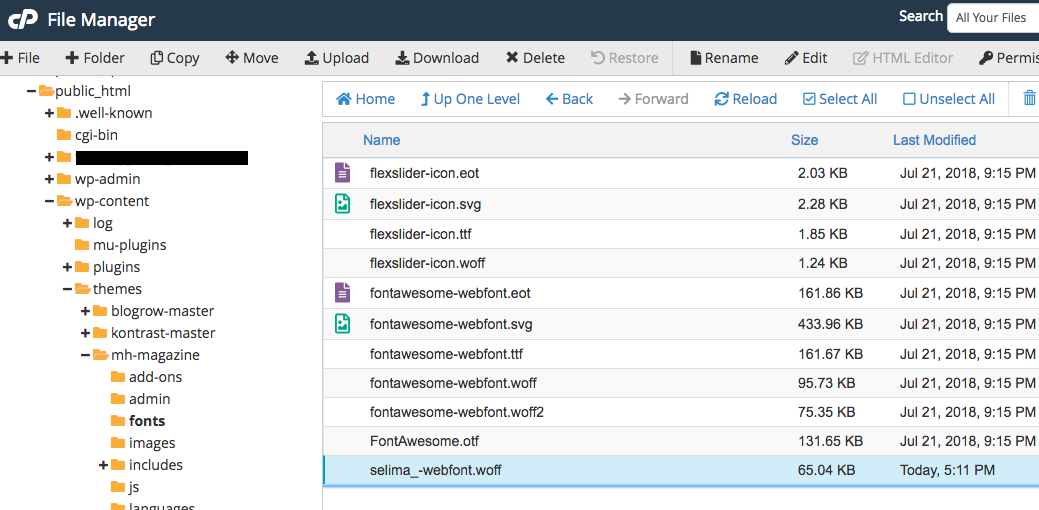
- Now you will want to upload the .woff and .woff2 files to your theme’s font folder using your File Manager/Cpanel under public_html –> wp-content –> themes –> my_theme_folder –> fonts.

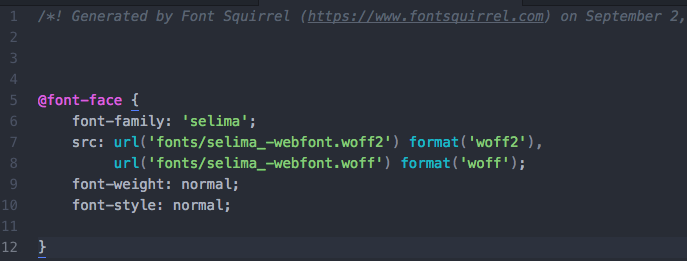
- Once you have uploaded your webfont, you will now need to update your theme’s CSS to allow your theme to know that font exists for use and to give it a name. Open the stylesheet.css file that came with your kit in step 2, copy its contents and add it to your themes custom css stylesheet by navigating to Appearance –> Customize –> Additional css. You can also add it to your themes core css stylesheet, but it will get overwritten in the next update. Note: please backup files before editing in case you make a mistake. Feel free to also rename the font-family name.

- Refresh your browser cache (on my mac it’s command + shift +R) and test that the font is loaded and available for use using for instance the following html code: <p style=”font-family: ‘selima‘;”>this is some test text</p> If it works, you are good to go! Although the font is available for use via html/css, it will not show up in your WP visual editor unless you take additional steps, which I won’t go into here but you can find pretty readily through google and some trial and error.
Conclusion: If $10 is no issue to you, I recommend using the Use Any Font plug-in (although other plug-ins like Hive are a decent alternative). Not only does it save you the hassle of file conversion and uploading files to your CPanel/File Manager, but the fonts also show up directly in your WP visual editor font drop-down menu. The manual method is a good technique to know, but practically I don’t see many people using this method unless they are already well versed in web development.
ONE LAST TIP
When using your custom font if you notice any blurring or distortion this could be due to the way the font is being rendered in the browser you are using. There are a number of ways to fix this, but the easiest fix for me is to add the following code when I am calling my font in html or CSS -webkit-font-smoothing: antialiased; -moz-osx-font-smoothing: grayscale;
Example custom font:
your text here
source code if using html: <h3 style=”font-size: 40px; margin-left: 30px; -moz-osx-font-smoothing: grayscale; -webkit-font-smoothing: antialiased; font-weight: normal; font-family: selima;”>your text here</h3>
source code if using CSS:
h3 {
font-family: selima;
-moz-osx-font-smoothing: grayscale;
-webkit-font-smoothing: antialiased;
margin-left: 30px;
font-size: 40px;
font-weight: normal;
}
Have you tried incorporating custom fonts on your website? What is your preferred method? Tell me below in the comments!

Be the first to comment